
2004-06 Pontiac GTO Files - Driveshaft tech talk
Author: “the Feisty Goat” Last update: 11/29/24
04-06 GTO Tech Talk:
Parts scarcity, model year differences, & driveshaft choices
Intro & Purpose
The primary purpose of this article is to educate and inform ‘04-06 GTO owners of their driveshaft (D/S) options; to emphasize the pros and cons for each option; and to explain what happens during our 05-06 D/S rebuild program.
In order to give you the full picture on the mechanical divide between the ‘04 cars and the ‘05-06 models, we will also discuss the most important differences between them. This information will guide your repair (or upgrade) path on your own GTO project, hopefully saving you a ton of lost time, money, headaches and disappointment.
Let’s get into it!

I. Parts scarcity & ghost companies
To set the stage for any new or recent Goat owner…
~10-12 years ago, if you needed axles or a driveshaft for your Goat project, you had a dozen options from at least 6 different companies in Australia and the US, but the decline in popularity of the GTO platform has resulted in a vacuum of aftermarket support, which affects everything from body parts, to suspension and driveline bits.
For a while, GTO & G8 owners in the US still had access to good OE Holden parts overseas, and these bits could be quite affordable (or expensive), depending on the AUD exchange rate of the time.
But this, too, came to an end, when GM announced it would be closing the doors to its Holden plants, ceasing their Australian auto manufacturing in October 2017.
Being candid without overstating it: the aftermarket in years 2018-2024 has become increasingly sparse for quality GTO parts, so it’s truly imperative that you stay on top of your physical and mechanical maintenance with these cars [as an owner], and that you address small problems before they become larger ones.
It’s also wise to behave like the owners of other limited production cars from the last hundred years: stockpile good spare parts for yourself…especially consumables, because once they’re gone, they’re gone.

Onto the second issue: a lapse in patents on many of these parts has allowed a handful of “overseas” companies to take original design plans and reproduce cheap knock offs, which now populate the web pages of Amazon, eBay and others.
Many of these off-brand products have underperformed in real-world conditions. Some are a genuine safety hazard, and shouldn’t be sold on the open market.
Others won’t even make it past the install phase because of fitment and QC issues. So it’s more important than ever to educate yourself on parts and products before clicking that “Buy Now” button online.
II. The 04-06 GTOs were never the same animal
A lesser known fact in today’s car world: while 2/3 of the body panels and 98% of the interior bits were interchangeable for all 3 years of GTO, the rest of the cars’ anatomy was completely different from ‘04 to ‘05.
The engine, exhaust systems, brakes and drivetrain parts were NOT fully homogenized, and are not directly interchangeable from ’04 to ‘05. Even the electrical systems were different, with the ‘05-06 cars moving to a more modern CAN-BUS setup, while the ‘04 cars had a traditional OBD-II system.
Why is this? Quite simply: the 2004 GTOs were rushed to market by GM executives, who were eager to sell an exciting car in an otherwise tired, aging fleet. The handicap of designing and selling cars “by committee” meant the finer points of the 2004 GTO were never truly addressed before its debut.
This article from Hagerty does a fantastic job at covering the scandals and successes of the ‘04-06 GTO/Monaro project, and how the car’s overall reputation in the US market was heavily damaged by the many shortcomings of the 2004 models. One of the most accurate and devastating excerpts from the article sums it up:
“As had happened too many times before, GM leaders put timing ahead of market readiness and were unable to overcome a lame launch with later improvements. As many have said, you don’t get a second chance to make a first impression.“
The cooling system components, ECMs, ABS modules, brake reservoirs, brakes, steering knuckles, driveshafts, axles, and exhaust were ALL different between the ‘04 and ‘05 models, which can make things confusing when searching for the right parts for your Goat.
Likewise, ‘05-06 models were nearly identical except for color options, so when we talk about GTOs, we will often specify “05-06 models”, and this is why.
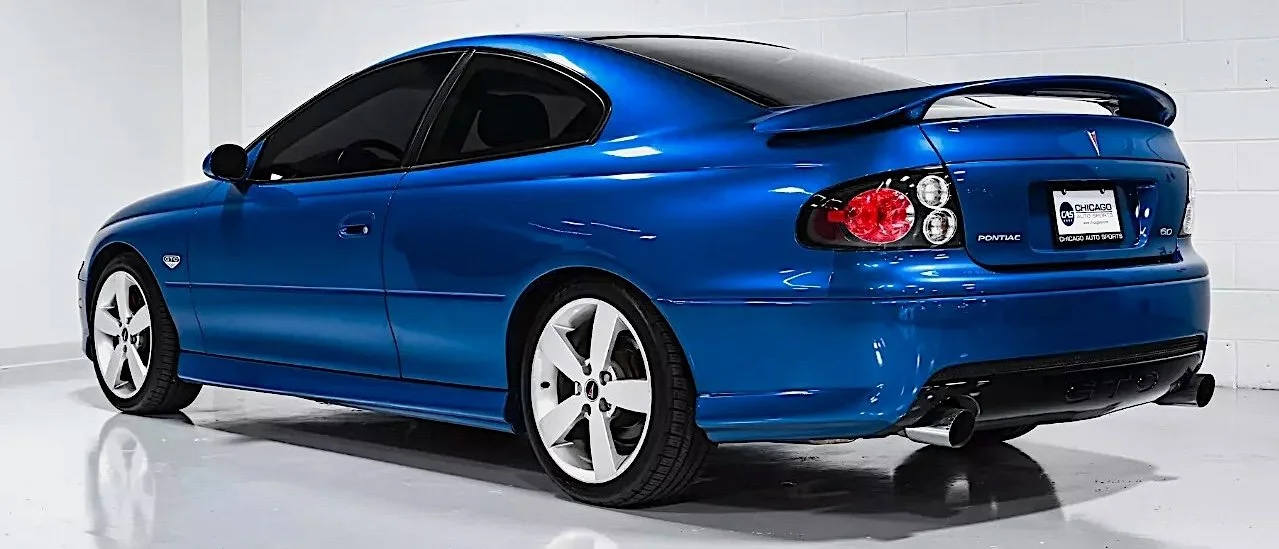
Unequivocally, from a cosmetic and mechanical perspective, the ‘05-06 GTOs were the ones to own. The engine bays were tidier and easier to work on. The drivetrains were stronger. The hoods had proper GTO snouts, and the rear bumpers had a proper dual exhaust and bumper splitter with the GTO letters in the middle.
’05-06 Goats received the new-for-the-time Gen IV LS engine, which featured better heads and engine management than the outgoing Gen III motor.
This leaves approximately 3 compelling reasons to ever buy a 2004 GTO:
“I really like this color, but was only available for 2004 models.”
“My friend/neighbor is selling a mint condition 2004 GTO, and I really like the way it looks and feels. I just want a fun street car that can seat 4. people”
“I am going to build a sleeper race car. I don’t care what it came with stock, because I’m going to throw the kitchen sink at it in race car parts, including a roll cage and a mini tub out back.”

You can do amazing things with an IRS GTO. You just need to do some homework first…
III. Who is “the Goat Whisperer?”
As we enter the drivetrain discussion, know that this information is the collective wisdom from a decade of stress-testing GTOs, and working closely with other GTO racers and enthusiasts during the years I was building, testing, and competing in my own, from 2007-2016.
We all spoke very candidly to each other about what worked, what didn’t; and what parts or combinations produced problems…versus those that solved them.
I also have additional working knowledge from repairing and modifying customer Goats from ~2011-2024, including G8 GTs (Holden Commadores).
In short, nothing in this article is your typical “internet conjecture” or keyboard quarterbacking. I deal in facts and hard truths, taken from thousands of hours of working with/on these cars, and I love to overcome mechanical problems…even if it’s as simple as educating and advising other car owners.
In this next section, you will see me abbreviate driveshaft with “D/S” or “shaft” a lot. Hopefully this doesn’t upset any readers…the word just gets redundant.
That’s all for the preamble. Let’s dive in!
IV. ‘04-06 GTO Driveshaft repair & replacement options
As stated earlier, ‘05-06 cars received uprated drivetrain components by way of a larger driveshaft and beefier C/V axles, while the ‘04 cars were saddled with the light-duty, borderline shameful drivetrain bits from the V6-powered Monaro CV6. This is where the disparity begins.
Both cars used triangular 3-bolt flanges to mate the D/S from the transmission to the rear diff, but the ‘04 driveshaft components and yokes are dimensionally smaller than those on the LS2 goats: 96mm diameter for the ‘04 donuts, versus 110mm for the ‘05-06s.
D/S yokes were proportionately smaller on the ‘04s to suit, and it is VERY noticeable if you see them side by side.
This means they are not interchangeable unless you switch to an output shaft (transmission) and pinion yoke (rear diff) from an 05-06 car.

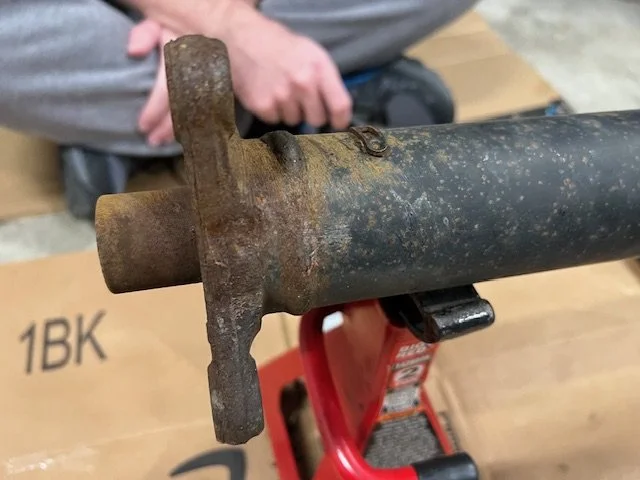
Photo of a stock 05-06 GTO driveshaft, where you can see the triangular flange, donut/isolator, and center support bearing.
This reality drives many ‘04 owners to move to a 1-piece aftermarket shaft via the use of adapter flanges, but a conversion to an 05-06 GTO driveshaft is not at all out of the question* if you are on a budget, and don’t want to deal with the drawbacks native to 1-piece metal shafts on this platform. More on that shortly in this article.
*Crashed GTOs are painfully plentiful in salvage yards across America, which means certain hard parts and interior bits are also still available. If the situation calls for it, we can help a customer source a replacement output shaft and pinion yolk to complete this conversion.
2004-06 GTO owners have 3 major driveshaft options, and most will decide based on their wallets…
1. 1-piece, 3.5” O.D. aluminum D/S - Cost: $800-1100 + labor
Pros:
Uses actual u-joints and flanges, the way the car gods intended. Can usually be serviced, balanced and modified at a local drivetrain shop, reducing the need for special order work if something breaks.
Stable to ~120-130mph, depending on your final drive ratio in the diff: numerically higher ratios reduce the critical speed.
Relatively low cost. Makes the car feel more direct under acceleration and shifts.
A properly balanced one can be awesome.
Cons: MANY… (strap in)
See also: user reviews on one of the popular brands - https://www.summitracing.com/parts/hmi-alds406sport/reviews

Speed limited, and the critical speed limits are overstated by some of the sellers. Real-world, we see good 1-piece aluminum shafts stable to ~130-135mph on stock 3.46 gears (top of 4th gear).
…This figure drops as low as 120-125mph when you stuff 3.91 gears into the diff, as the driveshaft and engine are now spinning faster to complete the same mph.
“Clearance, Clarence!”…heat shields must be bent/massaged out of the way (easily done); aftermarket exhausts may need modifying to clear the big ol’ shaft; stock exhausts/hangers will also need to be shifted and verified to avoid the steel hangers from contacting the driveshaft - this is a real event that happens a LOT on these cars when you stuff a 3.5” shaft in there.
[“PHRASING!” -Archer]
Flange fitment has been an issue on one brand, where folks complain the flange at the rear diff doesn’t allow access to the required bolts during install. Others have complained that the flange was machined wrong, too short, etc.
Low-hanging rear seatbelt bolts that come into the D/S tunnel must be completely ground down and clearanced to make way for the girthy 3.5” shaft. Not hard, but you’ll need a grinder and safety gear for this.
For some cars, it turns your aftermarket shifter into a vibrating rattle trap/hand massager.
Amplifies any weaknesses elsewhere in your drivetrain, especially worn motor/trans mounts, transmission main shaft/output shaft bearings, and rear differential/bearings.
…Things you didn’t know were a problem can become apparent with a metal shaft directly connecting the trans to the diff.
Some of the “Chinesium” 1-piece shafts vibrate as early as 60-80mph due to poor QC, or due to undiagnosed problems with the car that the stock D/S was masking.
…This has been the case for nearly a decade now. You can see it reflected in user/owner reviews in the Drivetrain subforum of ls1gto.com; on Summit Racing’s product page, and elsewhere on the web with a basic search.
Lastly, you WILL hear a routine “clunk” or “thunk” as you go from neutral to putting the car into 1st or Reverse. This is actually normal behavior for a 1-piece aluminum shaft, especially in an IRS car.
…The ‘03-04 Mustang Terminator Cobras, near and dear to my heart of hearts, did the exact same thing. I don’t consider this a con, but it’s not a desirable trait, so here it sits.

The name’s Shaft. JOHN Shaft…
Verdict: if you can find a GOOD 1-piece aluminum D/S that’s properly manufactured and balanced; verify the length for your application; and the rest of your car is in mechanically good, solid condition, then the 1-piece aluminum can be a solution, provided you don’t need or want to go beyond ~130mph.
Real-world: most of the GTOs I service need (at minimum) a refresh on the engine and transmission mounts, and/or rear diff mount, before the driveshaft has a stable environment to transfer power without component shifting and oscillating under torque.
2. 1-piece, 3.25” O.D. carbon fiber D/S - Cost: ~$1800-2200 + labor

Pros:
The smoothest operator in the crowd. Proves money can solve complex problems. These are amazing, high-speed stable, and ultra lightweight solutions to bridge that gap from your trans to your diff.
They will never fail in such a way as to pop up through your floorboard and make you soil yourself, which is a real concern on steel/aluminum shafts when doing hard drag strip launches. (this is also why driveshaft safety loops are so important for most of us)
C/F driveshafts have been utilized as original equipment on BMW M cars, Ford Mustang GT350 and GT500, Dodge Challenger Hellcat, and even the Alfa Romeo Stelvio (SUV). They work, and they work well.
Cons:
…if something should ever damage that shaft, including road debris/objects, it can shred and leave you with a very bad day: waiting for a tow truck, and being without car while you wait for S/O parts.
I have seen the bonding agents for the C/F to the steel/aluminum flanges fail from fatigue above the hot exhaust pipes on some cars. This was on aftermarket C/F driveshafts, not OE parts.
On the GTOs, a C/F shaft is a rare and typically special order option, so your car could be down for a while waiting for a new one, depending on the supplier situation.
Low-hanging rear seatbelt bolts that come into the D/S tunnel must be completely ground down and clearanced to make way for the girthy 3.25” shaft. Failure to do so can and typically will destroy your $2k shaft.
PRICE. Why must speed parts be so absurdly expensive!? (he asks, as a working-class retired racer)

Verdict: Most folks who only street-drive their Goats will never need a C/F D/S. It’s overkill for a sub-600hp GTO, but it’s an incredibly smooth and direct driving experience with the least amount of vibration woes. If you have the coin and the need, go for it.
3. OE 05-06 driveshaft rebuild w/warranty @ G-A. Cost: ~$500-700* + labor
Pros:
Lowest up-front cost.
You may already have the core parts on your car if it’s a 2005-06 that didn’t come from Rust Belt, USA, so we can give new life to an old part.
When healthy, these are smooth and vibration-free to ~170mph…far beyond the car’s aerodynamic and power limitations.
Custom paint colors available to match your ride, project or theme.
The rubber guibos (also called “donuts” or isolators) will never cause the noises and driveline vibrations folks experience with 1-piece aluminum units.
…there’s a reason GM and BMW have used this design on so many road-going cars, and it wasn’t to cut costs.

Cons:
Requires a clean, functional core to be rebuilt, so your shaft has to be in good shape [phrasing - we did it again]…or we will need to source a suitable donor, which can usually be done on the cheap.
1/2 to 2/3 of the shafts we rebuild require cleaning and painting, which adds a full day to the R&R time for prepping and curing the paint work. (custom colors are available, so this can become a plus for some folks)
If my suppliers ever stop making these parts, we’re all in trouble…the GTO community at large.
Doesn’t like high RPM drag strip launches**, especially with a manual transmission. This is easily mitigated, to a large degree, if you’re racing with tall, soft sidewalls, or on bias ply slicks, where the tire carcass absorbs shock and abuse when launching. (More on this at the very end of the article)
**…Automatic GTOs tend to do much better with the 05-06 D/S, as the torque converter is typically less violent than a clutch-car with direct connections. In the staging lanes, RWD autos and A4 Goats preload the driveline while the brakes are applied (car in gear), making for much smoother launches and less drivetrain shock
Verdict: If you aren’t going to make stupid high horsepower and torque, or doing high RPM launches for dig races and drag strip runs on the regular, then the 05-06 rebuild is a solid choice that will leave money in your budget for other maintenance and upgrades on your Goat project.
V. ‘05-06 D/S Rebuild
In today’s soft repair climate, most drivetrain shops won’t touch the OE GTO and G8 driveshafts. Ditto on CTS-V and Camaro 5-6 who utilize the same style of shafts. For these shops, the ROI simply isn’t there.
Thankfully, Goat Auto has an enduring love for these cars, and is well known for servicing and rebuilding the stock 2-piece driveshafts for the 05-06 GTOs. This is what we typically recommend for street applications below 700hp, that will not be seeing the abuse of heavy drag strip launches at high RPM.
A 2-piece driveshaft with at least 1 rubber isolator in the system will positively control/dampen unwanted driveline vibrations in real-world conditions, eliminating the risks and headaches inherent to a 1-piece aluminum swap.
If you’re reading this as an ’05-06 owner, we have some solid options for you during your next upgrade or repair. It involves replacing the 3 service items on the driveshaft; cleaning the steel surfaces and painting them with some type of VHT paint.
This produces a strong, reliable D/S that will go another 6-10 years without issue, for several hundred less than the price of an aluminum unit, and at least a grand less than the C/F route.
As a real world example, our 640bhp all-motor shop car, which is a truly violent machine in the first 3 gears, ran a rebuilt stock 2005 D/S…for 10 years of street hooning and weekend track events…through the shockwaves of a built 6-spd manual…without ever missing a beat.
The guibos never tore or failed. The hundreds of drag launches never caused a catastrophic event. The driveshaft loop, while always there, never had to wrangle a failed driveshaft. The shaft itself was stable to the mechanically limited 160mph of the car. So we have high confidence when we recommend this route to our GTO customers.


“What all do you do during this rebuild?”
The donor driveshaft/core must be carefully hand-cleaned and indexed, using multiple marks, to confirm that the shaft goes back together in the precise orientation which it came apart. It’s super common to need additional R&I time for de-rusting the surfaces and flanges of the D/S core.
A special 5-6” mechanic’s vice is needed to hold/support the fixed end of the D/S during separation. The vice needs to use soft aluminum teeth to provide safe clamping to the D/S yoke, without ever damaging it.
The vice holds the male end of the driveshaft pairing in place, while the female shaft is separated at the other end. Failure to properly secure the driveshaft into the vice in the correct area can damage the factory u-joint, which is not serviceable on these cars.
Once the cleaned and indexed shafts are separated, a special carrier bearing separator tool is employed to remove the failed stock C/B. The shaft is cleaned and inspected [more phrasing] before pressing on the new carrier bearing using a very large, deep socket specific to this job.
The rubber o-ring inside the female splined portion of the shaft is inspected and cleaned, or replaced (if needed). The retaining ring on the male splined shaft is also inspected, and in 95% of the rebuild jobs we do, is left alone.
The two halves of the D/S are now carefully aligned using the index marks made in the beginning of the job. A separate socket is used on the bottom end of the D/S flange to protect the factory “nub” from getting damaged while the D/S assembly is mated back together.
Details matter on this work: a damaged core from poor handling will fail prematurely and need to be completely replaced, so we are very meticulous and careful on these jobs
“Sounds easy enough. Could I just do this myself to save some money?”
While this work “can” be done yourself if you’re mechanically competent, it requires a lot of attention to detail; space to lift and support your car in order to remove the factory catback exhaust and driveshaft; about $250 in specialty tools; and another $300-400 in parts for the service items.
You will need to source a GOOD new carrier bearing and donuts, and not the cheaper knock offs currently being circulated on the web. I’ve had those off-brand carrier bearings fail in the early years we did this work, so we have since moved onto a much better supplier that’s been issue-free.
That said, evaluate all of this cost and unknowns against the price and convenience of having us perform the work in-house for you: a 1-stop shop with warranty on the work.


VI. Failure points and how to address them
Essentially a reiteration at this point in the article, the weak point on these Monaro/GTO units (for all 3 years) is the factory rubber isolator that suspends the carrier bearing between the 2 driveshafts, and it’s easily addressed, so long as the parts maker keeps supplying us with them.
The second weakness is the rubber donuts we discussed earlier. They are not a BAD design, but they are still rubber, and will eventually fatigue after 8-10 years, especially the front location, which endures the most exhaust heat.
If you don’t live in “the great white north” where roads are salted and chemically treated, then this fatigue is much more gradual descent, where they will show stress cracks, but still function in normal street use.
Let’s consult some helpful visual aids. The pics of the failed D/S below are from a 2005 GTO that spent 100% of its life in Missouri, Texas, and Chicago, so it is a solid example of what “life” does to these rubber components.


Photo on the top left is a new carrier bearing, with the arrow showing you the rubber suspension boot that, on cheap aftermarket parts, or after 10 years on the factory GM piece, will fail like a California marriage.
Photo #2 is the donut or guibo. You can see in photos #3 & 6 where the owner’s carrier bearing was completely destroyed before we ever met the car, and was likely driven this way for some time. This [regretfully] caused significant damage to other parts of the car.
Photo #4 & 5 are the factory donuts beginning to crack and dry rot after 19 years and 95k miles. The final photo on the bottom right shows the new carrier bearing about to be installed during a rebuild.
Physics are relevant here (as ever): the carrier bearing and the front D/S donut both live in a bad neighborhood…mere inches above the hot exhaust system, where the rising heat eventually destroys the rubber material.
The carrier bearing itself is virtually impervious, but the rubber responsible for centering it, and supporting the middle weight of your driveshafts, has a very finite life expectancy due to its comparatively thin construction.
Much like aftermarket C/V axles, where cheap ones use thinner-than-OE rubber boots that tear prematurely, so [too] do the cheap aftermarket carrier bearings tear or fail early on GTO driveshafts.
…WRAP IT UP, Goat Guy!
This was 15 years of information on a multifaceted subject in a single article, so yes, there was a lot to unpack on the subject. Those of you who made it this far, thank you sincerely.
Nearly all of the 100+ Goats that have come through our shop for the first time are usually experiencing this issue with the original D/S parts in various stages of fatigue.
GTO owners who aren’t taking their cars to qualified shops on the regular…will often fail to notice this issue is happening until the carrier bearing fails completely, allowing the driveshaft to flop about like a fish on a boat.
This unchecked movement and rotating mass typically ruins, at minimum, the output shaft seal of the transmission, and eventually fatigues the pinion bearings inside the differential if you don’t catch it in time.
This is where a $500-700 fix becomes a $2-4k problem if it takes out your rear diff components, like the pinion bearings.
That should just about cover all the key points.
My goal in this article is not to push anyone in one direction, as there are never faultless solutions in life, only compromises and prioritization. The driveline solution(s) you take on your GTO build will largely be dictated by your budget and power-performance goals.
Thank you for reading this far! Leave a comment below to let us know if the information was helpful.
You can always email us tech questions directly using the Contact link on this site. -F.G.

BONUS READ!
Short sidebar to reward the folks who made it this far down the article.
You can do amazing things with an IRS GTO. You just need to do some homework first…
Shown in the pic above is a wheel-standing launch by one of the O.G. GTO legends in the Texas circle, Randall “Housewolf” from the Houston Goat Herd.
Randall’s Cyclone Grey Metallic GTO was a finely honed Aussie rocket ship that blasted off 11.20 ETs @ 122-123mph, naturally aspirated on the stock bottom end LS2, way back in ~2008.
He used to race at the same track I did when there was a Pontiac or LS event…the now-defunct San Antonio Raceway, which was my second home for over a decade. (10 years later and I still miss it!)
Notice the rear bias ply slicks wrinkling on the hit of Randall’s launch: this action is normal and desirable. The tire carcass absorbs the worst of “the hit”, keeping expensive drivetrain components alive during the shock of a 5000rpm power surge.
Keep this in mind when we discuss tire selection, drag strip launches, and keeping drivetrain parts alive in other parts of this website.
In a time when breaking into the high 11s was a big accomplishment in an IRS GTO [without a power adder], Randall was knocking on the doors of the 10s. This is what happens when you dial in your total parts combination, doing much more with far less.
Years later, Randall retired the LS2 motor, and went all-in on a purpose-built 454ci LSX dry sump race motor in pursuit of a 9-second all-motor ET. After investing a lot of money and hot rodding science into the project, Randall hit his goal:
9.99 ET @ 135mph, N/A, 3600lb race weight w/driver.
Feel free to read more about his car (and watch videos of it): https://www.ls1gto.com/threads/modified-454%E2%80%9D-%E2%80%9806-gto.849490/
edit - I tried to find the copy of High Performance Pontiac where Randall and his Goat were featured circa ~2013, but d@mned if the Googles came up short! It was a great article that pitted Randall’s max-effort CGM against a first-gen Firebird with a ~455ci big block.
If any of you readers find it, please post up a link below in the comments.